I’ve been making these hats for fall for the last few years and they are so fun! You can easily add the pieces to any orange crochet beanie you’d like, so grab your go-to pattern and get started on a new orange beanie! Then, come back here to make the pieces to spruce it up!
Want to add some extra fun to your beanie? Add some ears and maybe even a bow! Keep reading after you finish the pumpkin pieces to find the patterns!

Pumpkin Beanie Pattern
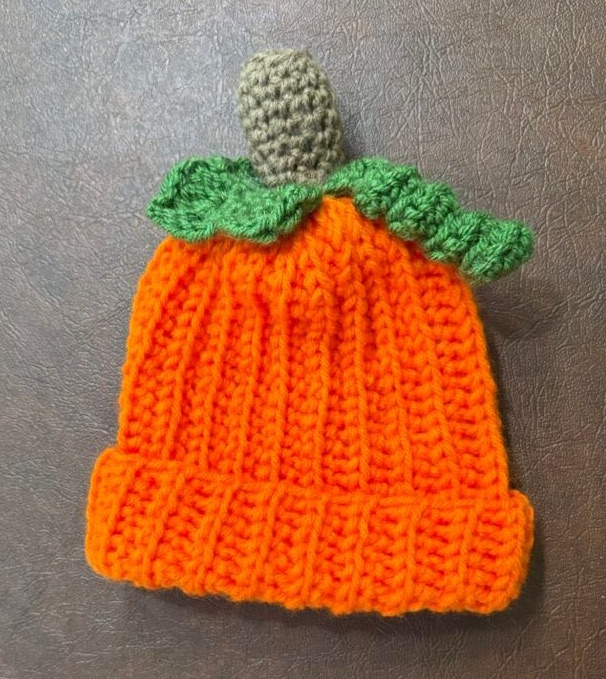
Supplies Needed: orange beanie (my preferred pattern from Lakeside Loops), 5.0 mm hook, brown yarn (I used Red Heart Super Saver in Cafe Latte), green yarn, black yarn (if you’re adding the ears), bow color yarn (optional), a small amount of stuffing.
Stitch Abbreviations Used: ch – chain, slst – slip stitch, sc – single crochet, hdc – half double crochet, sc2tog – single crochet two stitches together, dc – double crochet, trc – treble crochet.
Leaf (green yarn)
Row 1: magic ring – 6 sc, ch 1, turn.
Row 2: 2 sc in each around, turn.
Row 3: *ch 2 (does not count as a stitch), dc, [2 trc, ch 2, slst in first chain, 2 trc] complete [ to ] all in same stitch, dc, ch 2 (does not count as a stitch), slst to next stitch* repeat * to * three times total.
Fasten off, leave tail for sewing to top of hat.
Vine (green yarn)
Row 1: Ch 30, begin stitches in 3rd chain from hook, *2 hdc in first stitch, hdc next* repeat * to * across.
Fasten off, leave tail for sewing to hat on top of leaf.
Stem (light brown yarn)
Round 1: magic ring – 6 sc
Round 2: 2 sc each stitch around.
Round 3: BLO sc around.
Round 4 – Round 6: sc around.
Round 7: *sc2tog, sc next 4* repeat around.
Round 8 – Round 9: sc around.
Fasten off. Add a small amount of stuffing before sewing to the top of the hat.
Want to add a little more fun to your hat?! Keep going!
Ears (black yarn, make 4 pieces)
Round 1: magic ring – ch 2, hdc 6, slst to first.
Round 2 – Round 3: ch 2, 2 hdc each stitch around, slst to first.
Fasten off first 2 pieces. Continue on with th remaining pieces.
Round 4: ch 1, picking up one of the ear pieces you previously fastened off you will now put the wrong side together with the current piece and continue around, *2 sc in first stitch, sc next* repeat * to * around, slst to first stitch of round.
Fasten off, leave tail for sewing to either side of the stem.

Bow (preferred color)
Row 1: ch 20, begin stitches in 3rd chain from hook, hdc 18, ch 2, turn.
Row 2 – Row 5: hdc 18, ch 2, turn.
Row 6: hdc 18.
Fasten off, weave in ends.
Bow Center (bow color)
Row 1: ch 10, begin stitches in 3rd chain from hook, hdc 8.
Fasten off, gather center of bow and wrap around it. Fasten first and last stitch of bow center together and then sew to the stem to secure it at the top of the hat. I like to tack the top corners of the bow to each ear to help hold it in place too but that is optional.
Discover more from GETTING HOOKED ON CROCHET
Subscribe to get the latest posts sent to your email.